Tuesday, 19 June 2012

Antiques Hobby Roadshow

Welcome to Antiques Hobby Roadshow.

An irregular series of posts that looks at digging out those old minis from the back of the cupboard and reminiscing about the dark age good ol' days of war-gaming.

So without further ado, lets wheel out our first antique...


It's the late 80's and this guy was one of the first Space Marines I ever painted and quite potentially my first ever conversion - the Marneus Calgar inspired double power fists!


The original double fister.

This antique comes from the great renaissance period that was 'Warhammer 40,000: Rogue Trader' and one of many seminal GW figure releases of the era - the classic RTB01 Imperial Space Marines set:

'Just £9.99 buys you 30 of the most feared warriors in the galaxy!'


As you can see, subtlety wasn't really this chap's thing - He wanted your 'BLOOD' and he wanted you to 'DIE'!!!


He did however sport a very distinguished silver grey crop haircut and a rather fetching hand painted Blood Angels insignia.

Check out the faultlessly smooth application of 'Chaos Black'...


The inspiration for the figure was taken from the above Blood Angels squad by Aly Morrison .
An awesome piece  of work that still looks as good today as it did then. 

Well, i'ts back in the cupboard for you old friend. You have been super-ceded by the revolutionary new range of Citadel Finecast...  ;)

Until next time.

Monday, 18 June 2012

Kill Team - Iron Warriors pt.2

Hi there,

Here we continue our look at the Iron Warriors Kill Team and in particular, meet the guy who's been there, done that and got the t-shirt - It's 'Atreus the Immortal'!

'Siege of the Emperor's Palace? Yeah, I remember hanging out at that gig...'

It could be argued that a Dreadnought goes against the whole stealthy assassination squad vibe of Kill Team. But as mentioned in the previous post, this Kill Team is much more focused on forward recon and ensuring that it has the firepower to deal with any opportune targets that may present themselves...that's my excuse anyways ;)

Besides, what better way to do that than with a Plasma Cannon wielding, 12 tonne bringer of death?!

'Death you say? No problem, coming right up....'

The model for Atreus was based upon the Ironclad Dreadnought kit - helping to provide a more meaty Iron Warriors feel. First up, I measured and cut a suitable sized piece of plasti-card to slot into the vacant sarcophagus section. I'll work on adding in some extra rivets and detailing over the next few weeks.

The head itself comes from the trusty Chaos Defiler sprue, with the removal of the horns and the addition of a new set of 'mo-hawk' spikes. Atreus' right CC arm is built as is straight from the box although I think I'll do some work to make the power claw look a little more chaotic... The left Plasma Cannon arm was converted by using the classic Epic 40k Imperator Titan Plasma Annihilator Cannon (phew!):

'Behold! The Divine Beauty Itself!'

The original weapon piece looks a bit like this... 
...
The section where the arm joint would fit was measured up and carefully cut and filed out...

Here you can see the shoulder casing itself and the
two pieces of plasti-card cut ready to glue inside the joint housing. 

The plasti-card pieces glued into place...

The Plasma Cannon connected into the finished joint housing.

Whilst the main bulk of Atreus is complete, I'm going to take some further time to add a few additional finishing details such as spiky bits, chain links and the like. Here's a picture of the whole Kill Team so far. Looking good fellas...

'Auto-bots Iron Warriors... roll-out!'

Next up, it's time to make a strong coffee, crack out the paint brushes and give these fellas a paint job worthy of the name!


Sunday, 17 June 2012

Tell Me More... HeroClix

Today we're going to take a look at HeroClix.

I'll admit that I always had the impression that Heroclix was the preserve of young American nerds. And perhaps in one way, it is. But like all things in life, a good look beyond the cover reveals just that little bit more...

A game for nerds of all ages and nationalities!

Like many people, I've always enjoyed the escapism and artistry a good comic book can provide. I'm no aficionado of the genre by any means, but over the years I've bought my fair share of comics and read up on the back stories and ever evolving universes - Particularly of the Marvel variety.

So when I got some Amazon vouchers as a gift at the beginning of the year, I decided to investigate further and make some purchases...

Wolverine checks out the Sentinel's new Nike Air Max 90's.

First up, It's clear that HeroClix and it's innovative and award winning dial combat system is huge. It's been around since 2002 and was one of many evolutionary releases based on the game mechanics of it's predecessor, Mage Knight.

Skip forward to present day and the continuing world-wide juggernaut success of super hero movie releases such as Avengers Assemble and The Dark Knight Rises, all mean that HeroClix is at the height of it's powers. All of which has been supported by NECA / Wizkids' long standing national and international tournament scene, culminating in this years' Infinity Gauntlet event

A Marketeers' wet dream.

As is expected, there's a whole host of content you can find on the web to help gain a better understanding of what HeroClix may have to offer for you, but for me one of my most informative sources quickly became  HeroClix World.

I like war gaming and I like comics so you'd think HeroClix would be a good fit but I have to admit there was one thing that was a minor niggle - the quality of the figures. This is pretty critical for most people in any good table top game and some of the early sculpts and in particular, paint jobs, can certainly give you the heebie jeebies... But it's clear that NECA / Wizkids have really upped their game in this area in recent years.

I've now read the rules through several times and got a feel for how the game plays out. I'll be honest though and say that at this stage I've yet to turn a dial in anger... Apologies if you were hoping for a full review of the game ;) Hopefully this is something that will be rectified over the coming months. For now, I'll leave you with some more pics from the collection so far.

Abomination and Ghost Rider look deep into each other's eyes.

M.O.D.O.K. and The Leader settle down to watch Countdown. 

Apocalypse let's Cyclops and Jean Grey know who's boss. 

The Punisher and Black Tarantula discuss the latest economic crisis.  

'Do The Hustle...!'

Dare Devil, She Hulk and Lycra.

An attempt to repaint Wasp (face  pending...)

The collection so far...


Necromunda - Gang WIP

Some fairly memorable things happened in 1995.

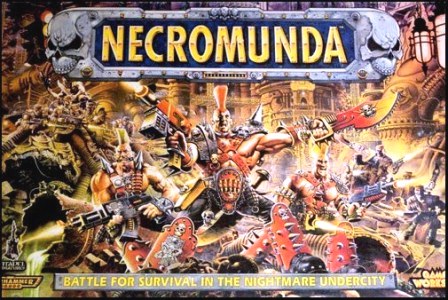
White Zombie released 'Astro Creep: 2000', some guy stole a tank and went on a rampage through the streets of San Diego and Games Workshop brought us a game about battles in the Underhive:


Whilst I moshed away to White Zombie and watched in amusement at the yank in the tank, I foolishly failed to buy a copy of Necromunda. How engrossed in Epic 40k I must have been...

Fast forward to a few months back and I took the opportunity to download the free rules on the GW website.

Whilst my sponge like hobby brain had remained up to speed with the releases and developments of the game throughout the years, reading through the rule book in earnest really made me realise what I had been missing out on. When my gaming buddies recently showed me their new Van Saar and Redemptionist inspired gangs, the touch paper had been lit.

Pen and paper in hand, I sat down and started drawing up my gang:


Half the fun of Necromunda is in giving your gang it's own identity - Defining it's individual's colourful and dangerous pasts and shaping it's future ambitions and bloody achievements.

Over the coming months I'll develop and share these with you further and take a look at the list itself and the tactics I have in mind. But for the moment, let's start at the beginning...

Not a very nice man.
This is my Gang Leader. He's a gnarly and mean son of a sewer rat and has carved out a fearsome reputation even amongst the brutal scum and villainy of the underhive.

This tyrannical and violent persona is further re-enforced by his extensive need for replacement cybernetics. Affordable and readily available in the Underhive? Not in this tech-poor excuse for a cesspit! But rather the enforced consequence of slaying a Goliath Gang Leader in a gory and bloody close quarters fight to the death...at least that's what I plan on putting in his C.V.

Conversion wise, the cybernetic leg was sacrificed from this old Inquisitor Terminator model:

Sacrilege I tell ye! Sacrilege!

The Gang Leader's chainsword fore-arm was lifted from the SM Commander sprue and pinned onto the bicep of a bare arm taken from the Catachan Jungle Fighters. To achieve the desired arm position I hollowed out the torso at the arm joint - I'll plug the remaining gap with some green stuff at a later date.

Cybertron!

The plasma gun was achieved by removing the bulk of the original arm's las-gun, leaving the butt and handle elements in place so that the newly cut plasma gun casing could be slid into position (you can just make out the white joint 'seam'). A shoulder strap was added for good measure.

Strap on.

Next up is one of the gang's Heavies. Unsurprisingly, he's another nasty piece of work...

Hard Case.

The plasma gun on this model was a little easier to add and was a fairly straightforward job of manipulating it into position with the model's hands.


All the heads used for the Gangers are lifted from the characterful Chaos Marauder Horsemen sprue. GW should really release a range of good quality head sculpt packs shouldn't they? (thank god for the little guy eh?). The legs are from the SM Scouts sprue - helping to give the gangers more physical presence.

And here is one of the gangers:

'Look! It's only Carmen bloody Electra!'


And finally for now, here is one of the Juves:

Kids with guns...

To help distinguish the Juves from the more senior gang members, I've opted to use the standard Catachan Jungle Fighter legs and heads. (The overtly muscly arm sculpts aside) the legs and heads are less bulky in scale and help further emphasise the Juve's yet to be developed physical and metaphorical stature within the gang.

Next time we'll look at the rest of the gang and start preparing them for their first true battle within the Underhive!


Friday, 15 June 2012

Terrain - King of The Hill

Here's a quick and simple guide for making some hills to add to your terrain collection.

I decided on a Fantasy theme for this one, although the same general principles apply for Sci-Fi / 40k inspired rocky desert themes - Go crazy!


Step 1 - Head down the DIY store and grab yourself some insulation board.

What we're looking for here is a high density extruded polystyrene. The boards tend to be pink or blue in colour and products like Knauf Space Board or Kingspan Kooltherm are ideal, sold in varying sizes and at reasonable cost.

Alternatively, if you've just received your pay cheque, why not place an order on line from somewhere like this...

If you're really stuck for choice, you can just grab some good old Celotex, which is what I'll be using for this build.

Firm and satisfying to cut Space Board on the left squares up to
somewhat crumbly yet workman-like Celotex on the right.

Step 2 - Using a small handsaw cut out the rough shape of the hill you want to make. Grab your snap off knife and cut away at the insulation board, removing 'slices' to start recreating the feel of a jagged rock face. You'll need to change blades every so often as foam board blunts knives for fun...

Once you're happy with your finished shape, undercoat the hill with a primer. Once this is dry apply a further base colour of your choice - In this case GW's Steel Legion Drab, although you may want to go with a more traditional grey rock finish.

Looks appetising...

Step 3 - Using your trusty Citadel Spray Gun, or similar, lay on a further top colour that will compliment your final flock / sand finish - In this case we're going for a grassy finish so went with GW's Castellan Green.

Caution: Wet Paint.

Step 4 - Apply highlights to the edge of the rock face. In the example below, two highlights were applied - One of Karak Stone and a second, lighter highlight of Screaming Skull.

Starting to take shape...

Step 5 - To ensure a far superior bond than PVA, I recommend applying wood glue to the area of the hill you want to flock / sand finish. You may want to add a small amount of water to the glue to ensure it flows easily upon application.

Woody, gluey, wood glue.

Step 6 - Flock or sand the top of the hill. Remember to have a suitable sized flock box handy or lay down some newspaper to catch your flock for future use. Once you've finished, leave the model over night to give it a good drying out.

Cypress Hill...?

Step 7 - Place your newly finished hill onto your games table, add some additional scenic elements to garnish and pat your self on the back for a hobby job well done!

No, King of The Hill!

To help ensure your scenery goes the distance, it would be worth mounting the hill on some 5mm MDF board round about Step 2. Glue some chippings and course sand to blend the hill into the base ;)

It's worth mentioning the use of an airbrush in this build - In this case the Citadel Spray Gun, which was used to apply all of the base coats and considerably helped to speed up the overall build time.

There are of course far superior airbrushes on the market but the GW offering is more than up to the job if your starting out. Once you get a bit more comfortable with using an airbrush you'll want to start considering investing in a compressor. This post from my old buddy Pete should help set you up with all the advice you need.


Thursday, 14 June 2012

Dystopian Wars - Prussians

Hi, here's some pictures of my Prussian Empire Naval Battle Group for the rather wonderful and deservedly popular Dystopian Wars.

The models were primed with an Army Painter 'Uniform Grey' base coat followed by a liberal wash of GW's Nuln Oil. Successive highlights of Administratum Grey and Pallid Wych Flesh were then applied.

All weapons and Tesla coils were picked out in Balthasar Gold, given a wash of Seraphim Sepia shade, alongside a final highlight of Leadbelcher.

It's worth mentioning the German Maltese Cross decals sourced via Dom's Decals. They help provide a nice sense of scale and finishing detail. I'll need to chuck on some of GW's new Lahmian Medium at some point to reduce the shine ;)

Enjoy!


Related Posts Plugin for WordPress, Blogger...